|
On the 2nd of July 1952, I received my first flying lesson as an Air
Cadet on a Flying Scholarship. The aircraft was a Fleet 80
Canuck, designed and built in Canada from 1946 until 1967.
Wanting a model of that aircraft has been my wish for many years but
without a kit the only way would be to scratch-build one, here is my
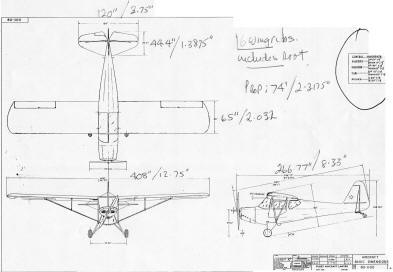
version of CF-EAO operated by the Windsor Flying Club. Drawings of
the aircraft were obtained from the Museum of Flight in Langley, BC.
and these were then scanned and sized in Coreldraw to give an
accurate 1:32 scale working plan. Multiple copies of each view
were made and used as templates for the various pieces which were
then transferred onto plastic card. |
| |
 |
 |
 |
| |
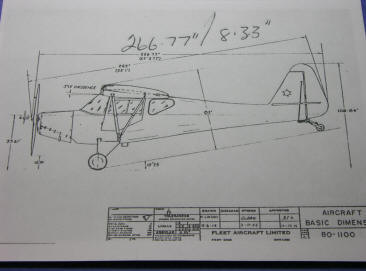
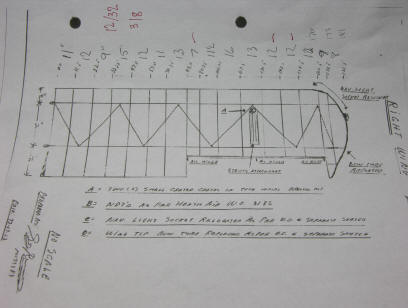
The factory dimensional drawings were first converted to "inches"
then carefully sized on the computer, printed out and checked for
accuracy. |
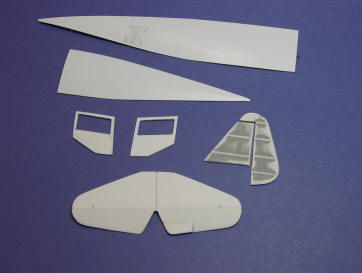
Using the scaled drawings I made templates of each part then cut the
plastic to fit the drawing. |
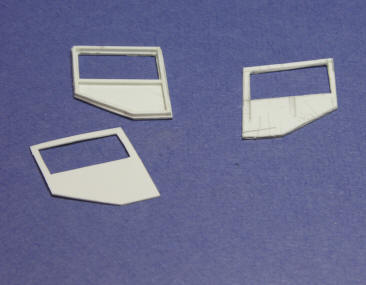
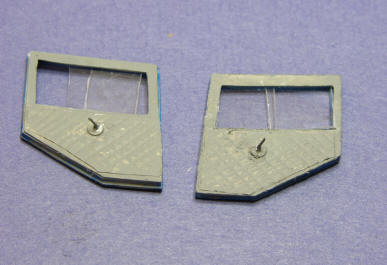
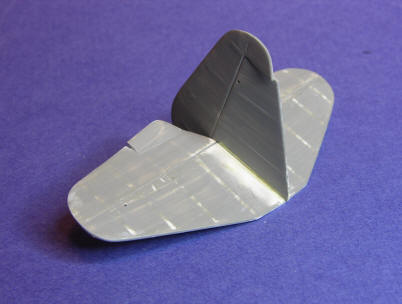
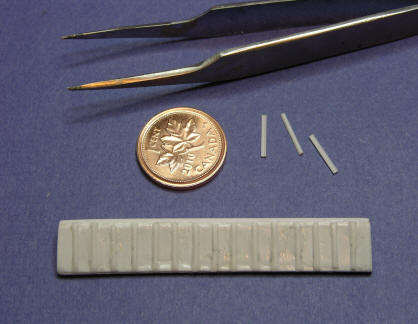
From top to bottom: the .015" bottom and top skins, doors, and
vertical and horizontal tail cut from .040" plastic. The tail
pieces had the rib tapes made from .005" strip |
| |
 |
 |
 |
| |
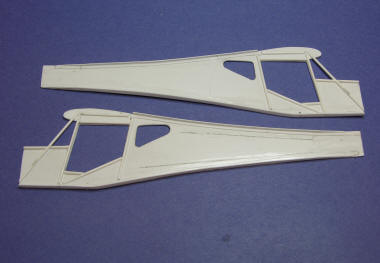
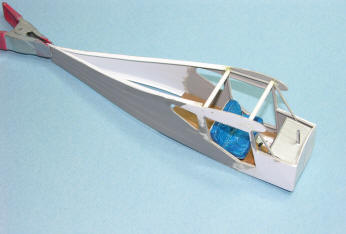
The fuselage sides were cut from .020" plastic and "L" shaped strip
added to the top and bottom for strength. I then added .030"
plastic rod for the exposed tubing structure. |
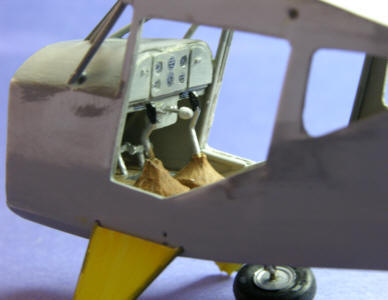
The single double wide seat was made from sheet and rod and Milliput
used for the cushions. Seat belts were added later. |
The gas tank and flooring along with the stick and rudder pedals
were added...with brake pedals on the left side only. Pretty
scary for the instructor! |
| |
 |
 |
 |
| |
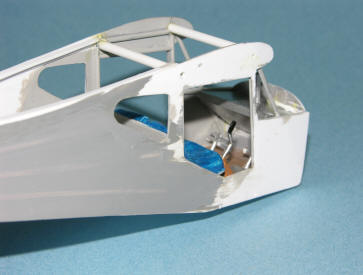
The top and bottom skins were first scored on the inside with a
ballpoint pen the glued in place and the cabin structure installed. |
The door skins were cut out and a square tube structure added
leaving room for a channel into which I installed the sliding window
pieces. |
The inside of the doors were covered with a quilted material which
is replicated using aluminum foil. Brass handles finish them
off. |
| |
 |
 |
 |
| |
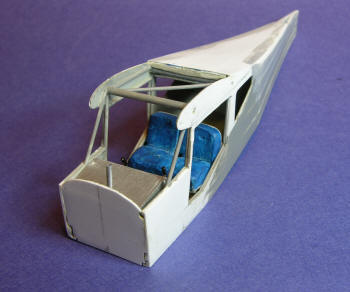
The tail assembly ready to install showing the very thin rib tapes
and elevator trim tab. The tapes are .005" strip sanded and
filled until only a faint bit of detail shows. |
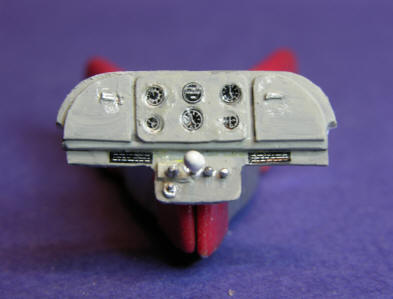
The instrument panel is very basic made from plastic card, wire
switches and throttle and instruments and placards from Mike Grant
Decals. |
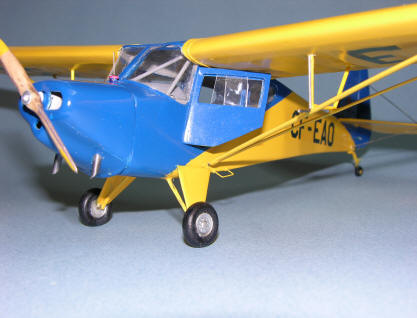
On its gear made from .032" wire and plastic card with wheels from
the crap box. Sticks fully forward naturally! |
| |
 |
 |
 |
| |
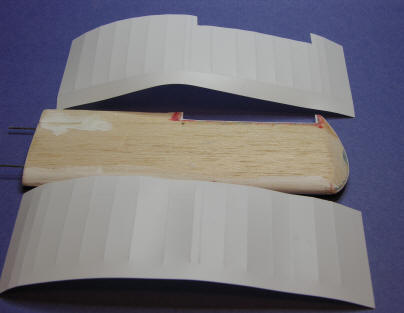
The factory wing rib drawings were used for reference in laying out
the embossed ribs in the .015" plastic wing skins. |
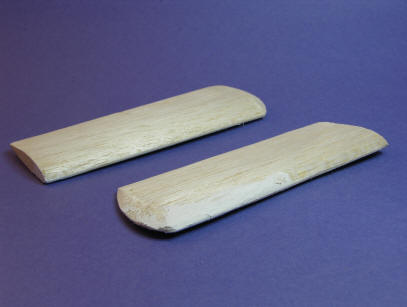
The balsa cores are finished and the leading edges back to the main
spar are hardened off using multiple coats of Super Glue which is
then sanded smooth |
The aileron cut-outs are lined with .020" plastic and a .030"
plastic rod glued to the tip bow. The skins and cores are
carefully sprayed with Super 77 Contact cement |
| |
 |
 |
 |
| |
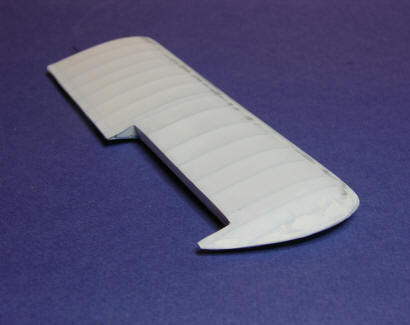
The embossed wing skins show off the ribs and the correct "fabric
sag". That plastic rod mentioned earlier...used to glue the
skins at the tip! |
The ailerons on the full size aircraft are aluminum with stiffeners
embossed for rigidity. Here the stiffeners are replicated
using half-round .030" rod..that's 60+ tiny strips! |
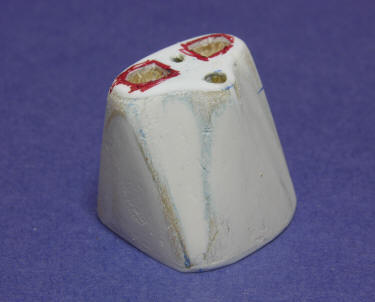
A cowling plug was carved from balsa then used to vacu-form the
finished product from .040" sheet plastic. Only one attempt
was needed to get a good copy. |
| |
.JPG) |
 |
 |
| |
With all of the components completed it was time for one last test
fitting. Everything OK then the model was painted before final
assembly. Fleet Aircraft had a big supply of Consolidated Blue
and Trainer Yellow left over from WW2, SOOOO! |
The windshield gave me plenty of headaches but it worked OK in the
end. The painted model received the registration decals which
I made on an Epson 680 and Bare Metal Decal Paper. Final
assembly with little details such as gas cap and "bobber" gauge,
steps and prop were added |
The prop was carved from two laminations of a coffee stir stick and
yes there is a Continental C85-12F inside the cowling! |
| |
 |
 |
 |
| |
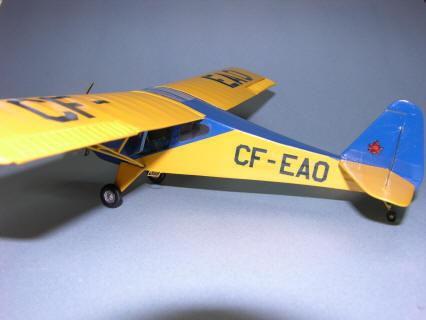
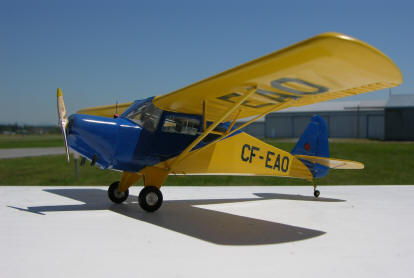
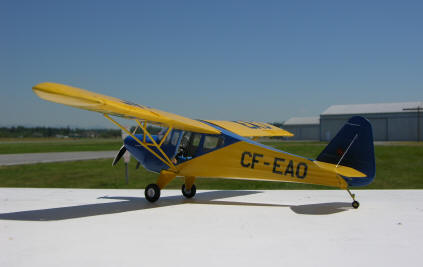
Here is the finished product! Not perfect but a pretty fair
rendition of one of my favourite civilian aircraft. Over the
years I have flown 39 different Canucks as both student and
instructor and it has always been a pleasant experience. |
The official Fleet Canuck logo |
My last flight in a Fleet Canuck was in 2003 as an instructor and
the two brothers that I finished off for their Private Pilots
Licence are now flying commercially. Full circle, a 51 year
affair with a fun machine. |
| |
|
|
|
| |
|
And to Jim Pelkie my first instructor, may the skies always be blue
and the wind at your back wherever you might be.. Thank you
Jim! Per Ardua Ad Astra |
|